How to Integrate Calendly with Salesforce Using MultiSync Made Easy
Here is a step-by-step guide on how to integrate Calendly with Salesforce with the help of MultiSync Made Easy using Oauth 2.0.
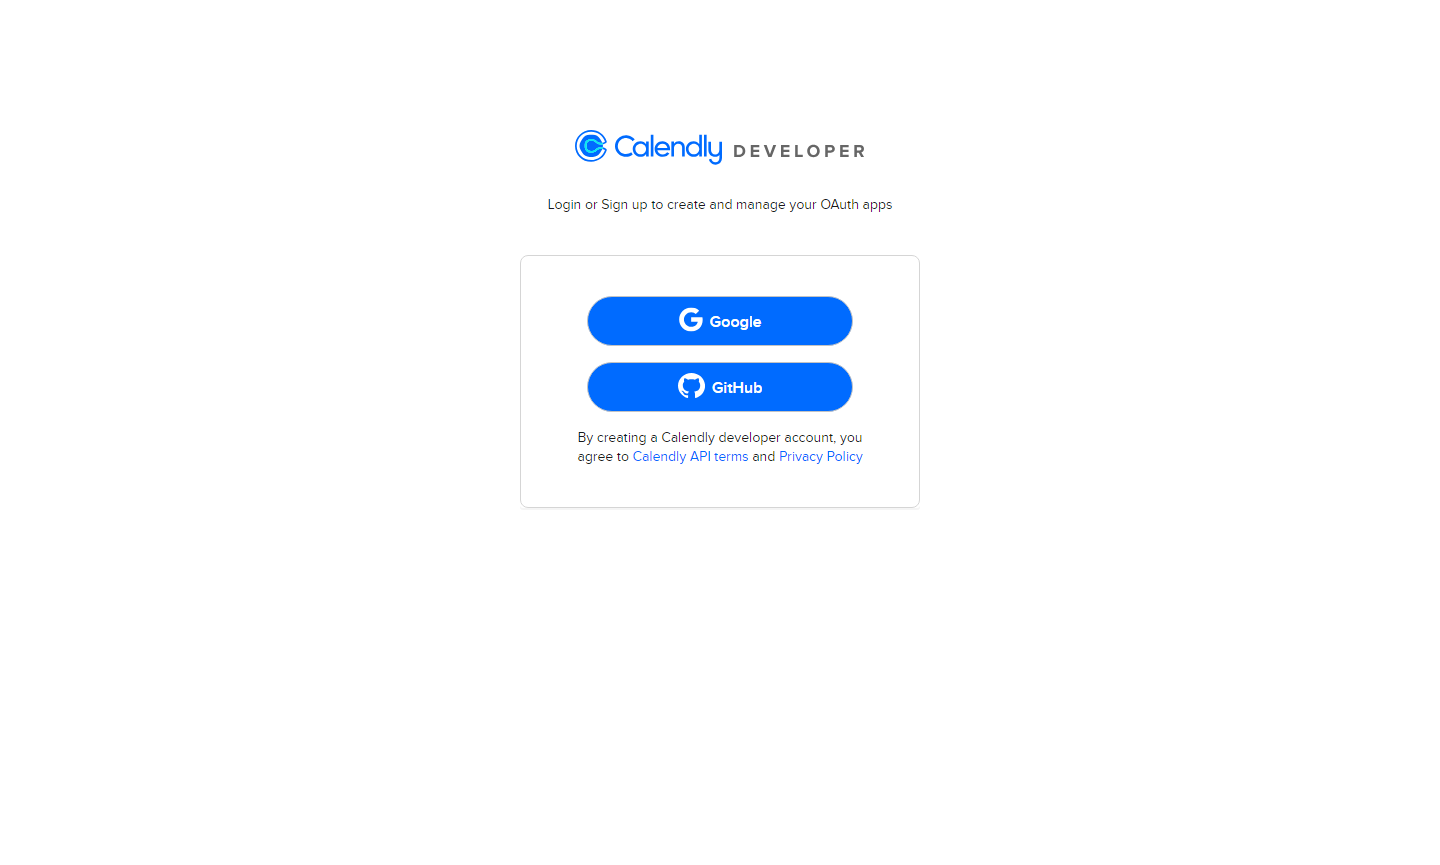
Step 1 :- First you need to create a developer account with calendly. To create account please
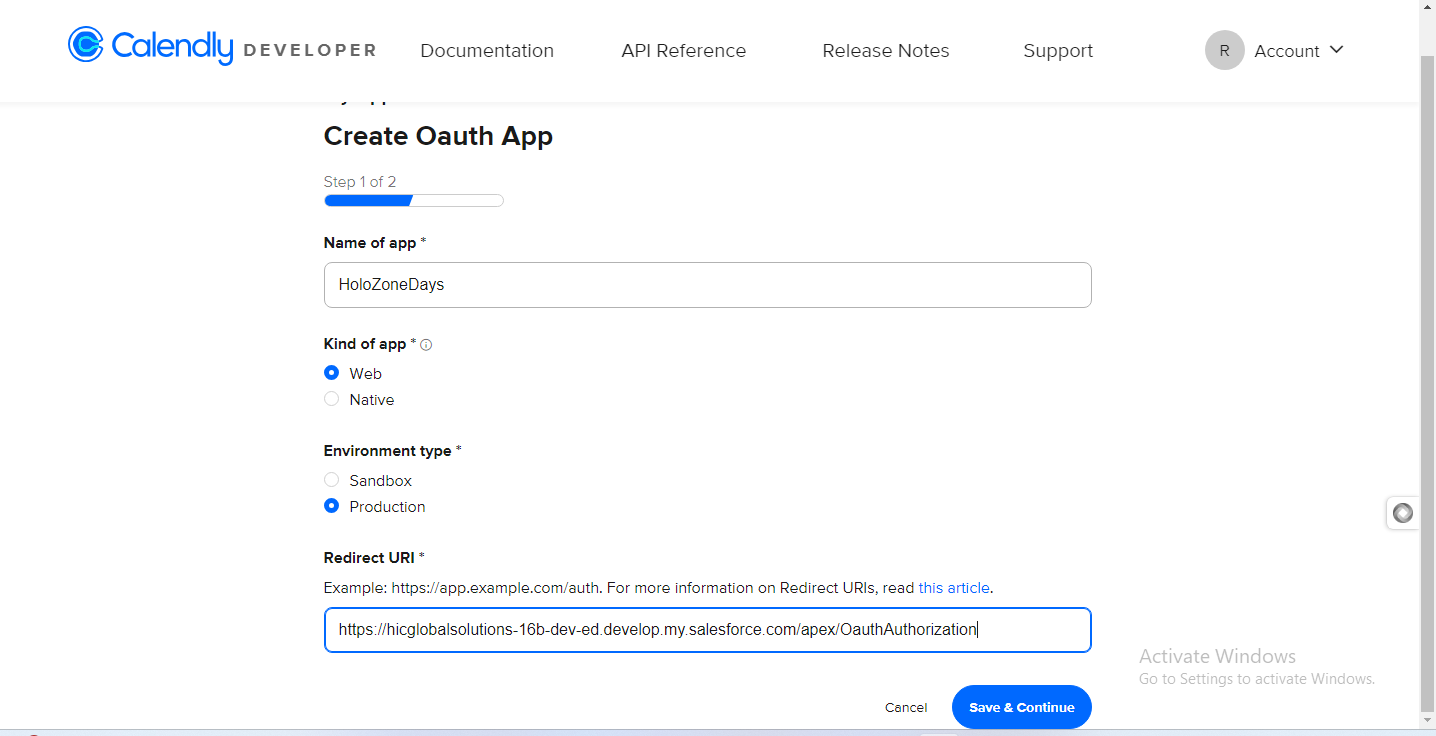
Step 2:- Create new app
Step 3:- Provide the details and enter your callback URL just as shown in the screenshot below.
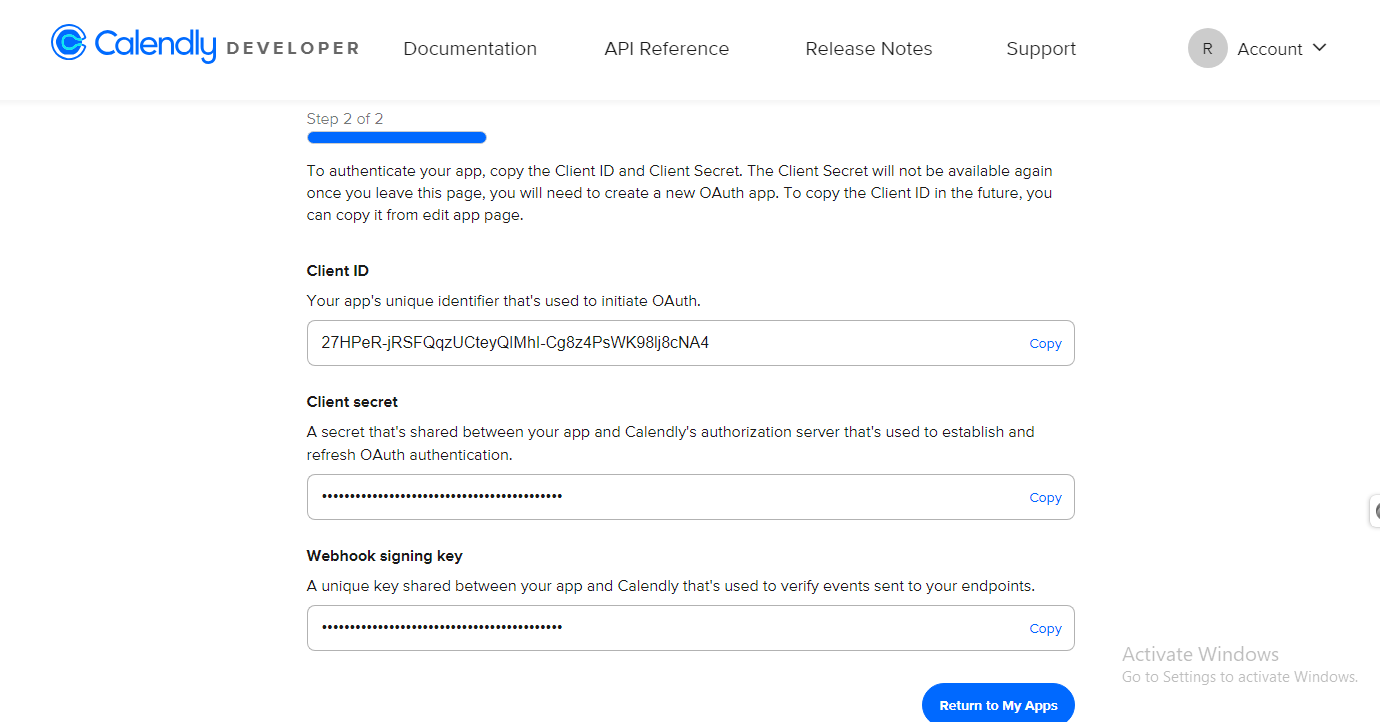
Step 4 :- Later, you will receive the client ID and client secret.
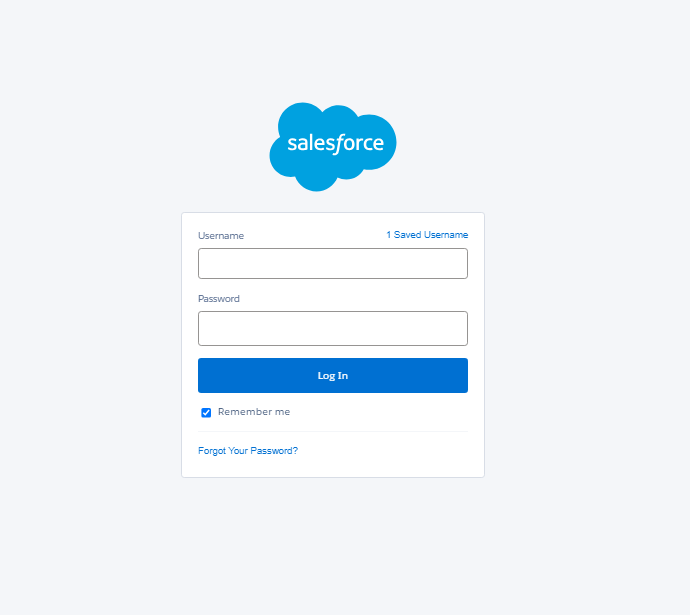
Step 5 :- Now, it’s time to log in to Salesforce.org.
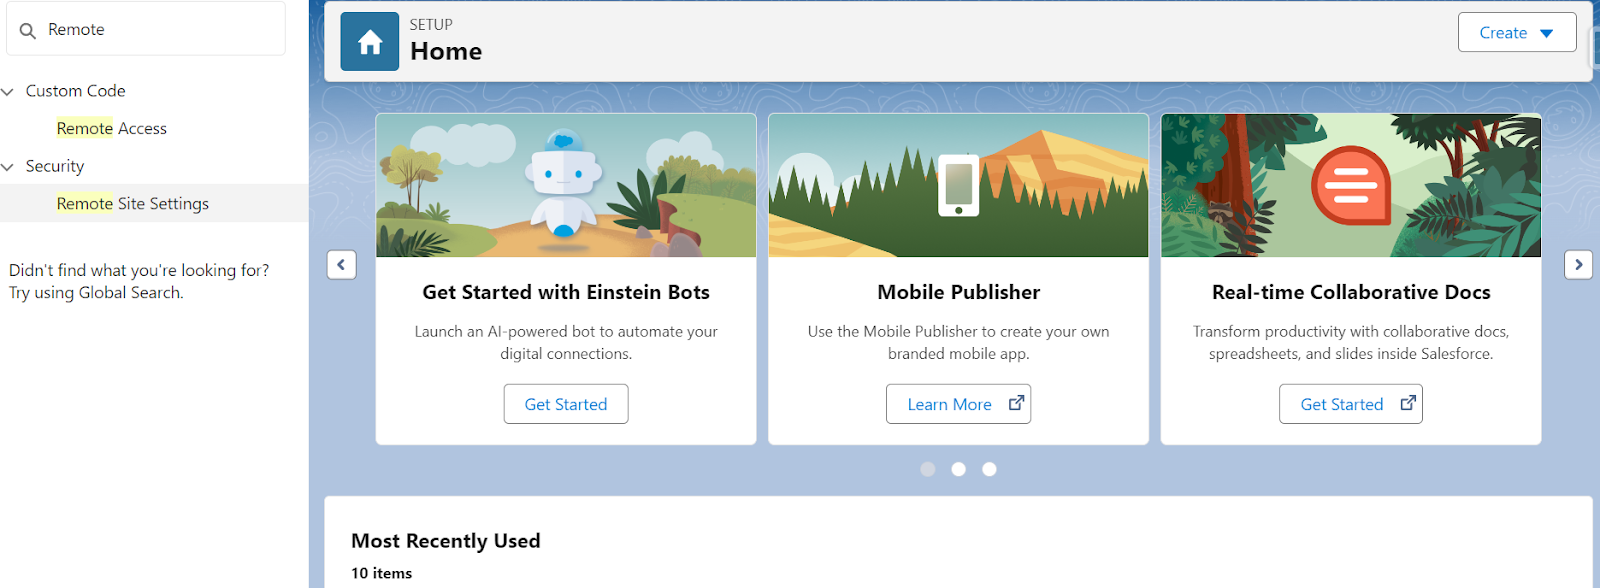
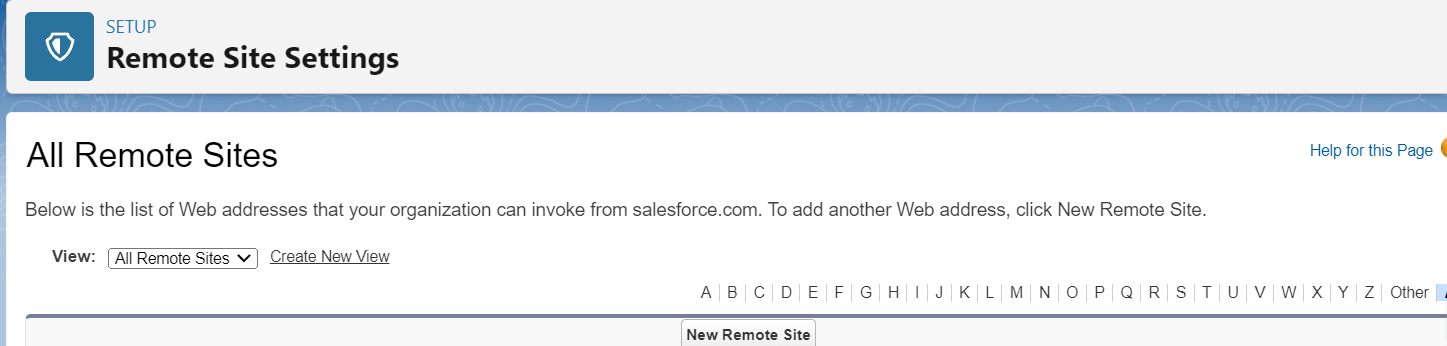
Step 6 :- After login , click on Quick find and Search for Remote Site Setting and Click on it .
Step 7 :- In the Remote site setting you will see a button for New Remote Site, Click on it.
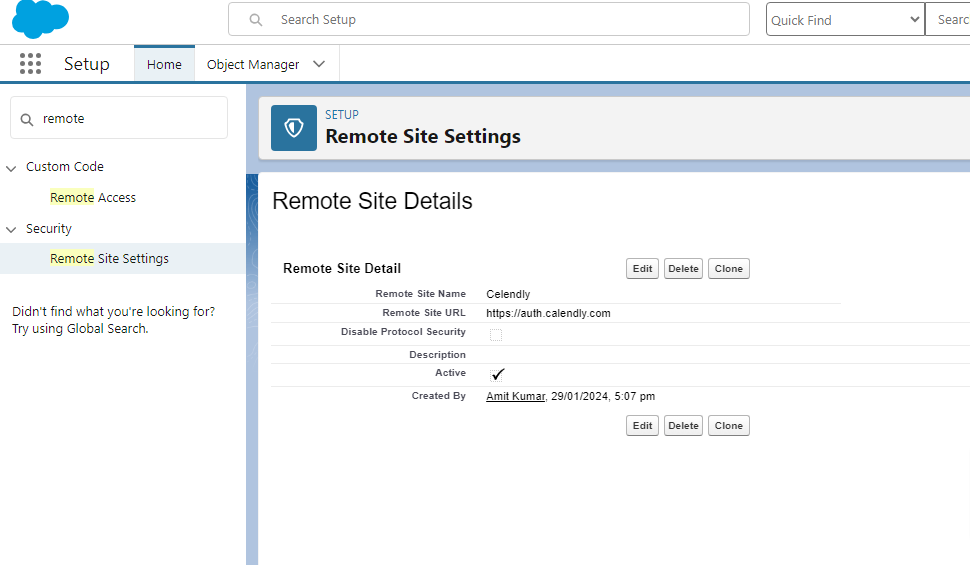
Step 8 :- Now, enter the Remote site name, like Calendly and the remote site URL which will be (https://auth.calendly.com) then save it.
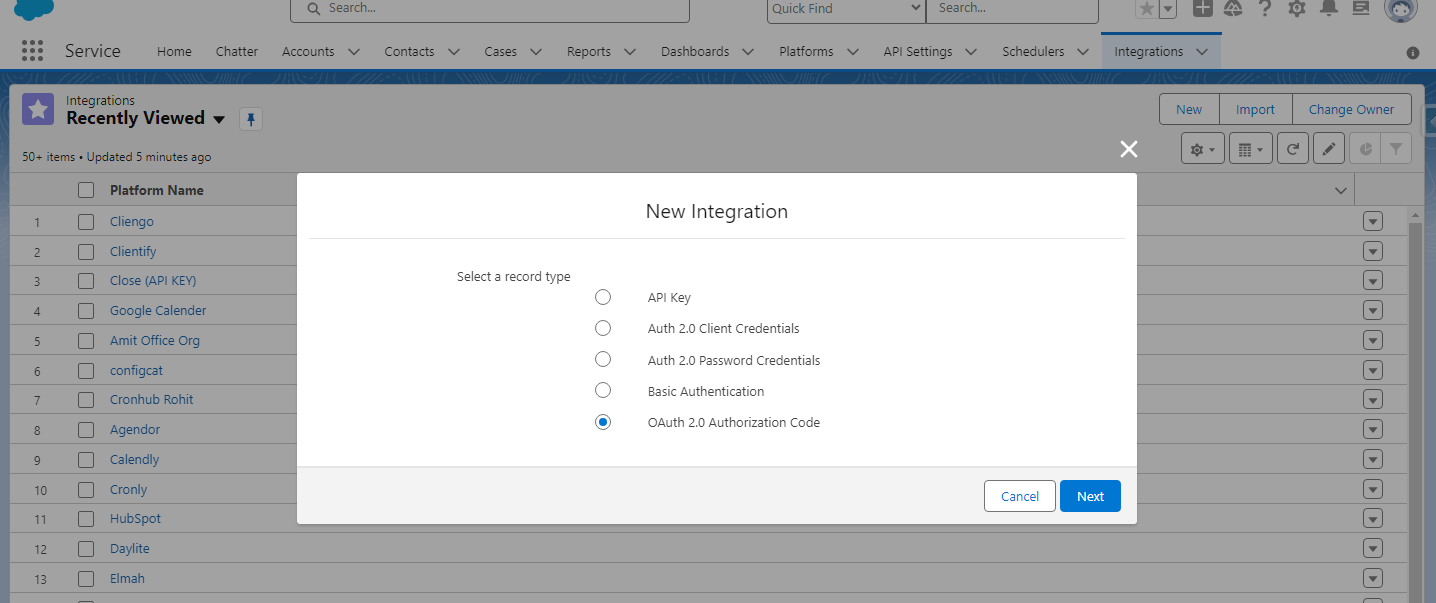
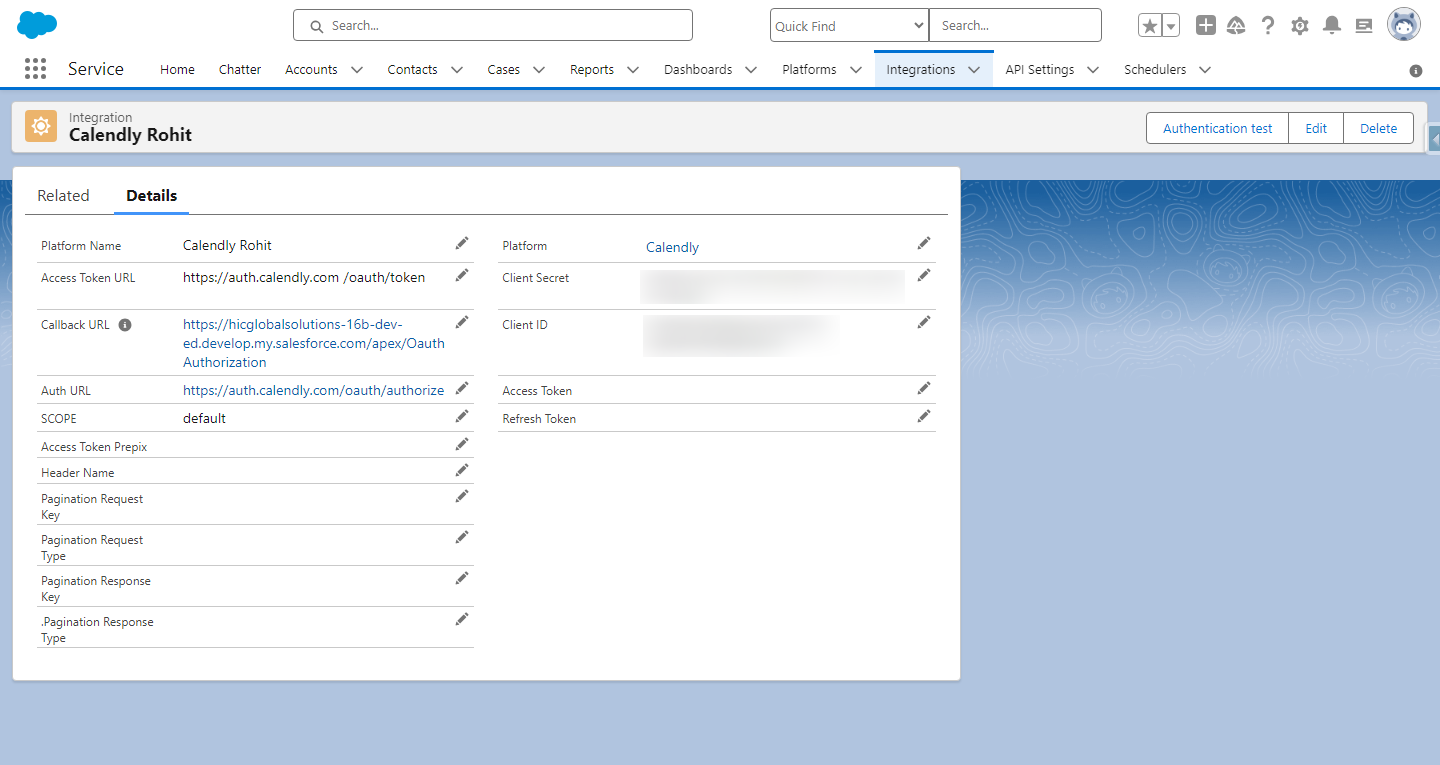
Step 9 :- Now, click on the integration tab and click on “New.”
Step 10 :- Select the “OAuth 2.O Authentication code”
Step 11 :- Enter the client ID, client secret, callback URL, and click on authentication.
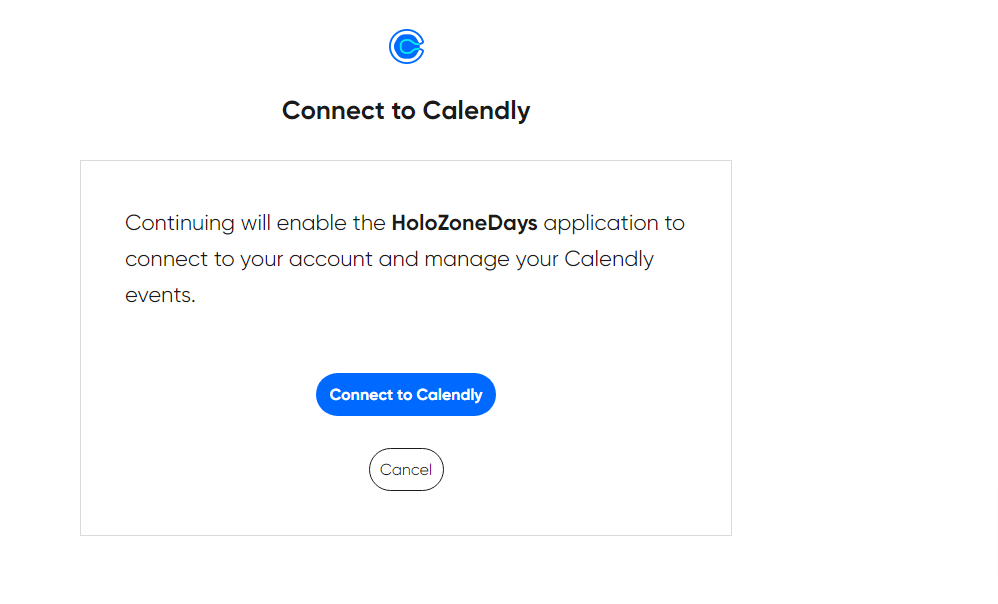
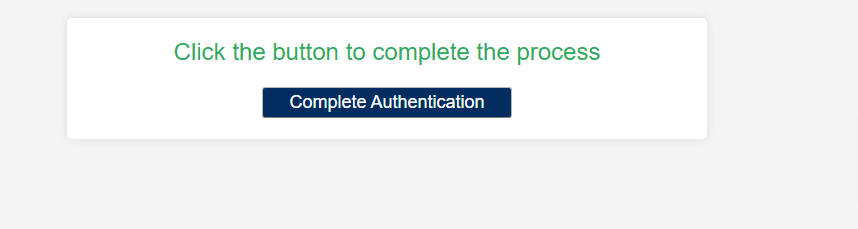
Step 12 :- Now, you can finally authenticate with Calendly, and complete the authentication.
Once you complete the process your access token will be generated.
Conclusion
So, here is our strategic guide to integrating Calednly with Salesforce using our Native ETL tool – MultiSync Made Easy. Feel free to try out and share your experience with support team.