Loading...

A Step-by-Step Guide to Integrate Clickup with Salesforce Using MultiSync Made Easy

Mentioned below are the key steps that will help you integrate Clickup with Salesforce using MultiSync Made Easy – a native ETL tool.

Step 1 :- To integrate Clickup with Salesforce, you need to create your app on Clickup from here

Step 2 :- Click on your avatar in the lower-left corner and select integration as shown in the screenshot below.

Step 3 :- Click on ClickUp API and create app

Step 4 :- Provide the app name and add Redirect URL.

Step 5 :- As you complete the process your Client ID and Client Secret will be generated.

Step 6 :- Now, log in to your Salesforce org.

Step 7 :- After login , click on Quick find and Search for Remote Site Setting and click on it .

Step 8 : In the Remote site setting you will see a button of “New Remote Site“, click on it.

Step 9 :- Now enter the Remote site name, like Click Up and the remote site URL which will be ( https://app.Clickup.com) then save it.

Step 10 :- Now click on integration tab and click on new.

Step 11 :- Select the OAuth 2.O Authentication code.

Please Note: Enter your client ID and client secret, click on it. Then, click on save and authenticate it.

Step 12 : Enter client ID, client secret and callback URL also add auth URL- https://app.Clickup.com/api and token URL- https://app.Clickup.com/api/v2/oauth/token and authenticate it. 

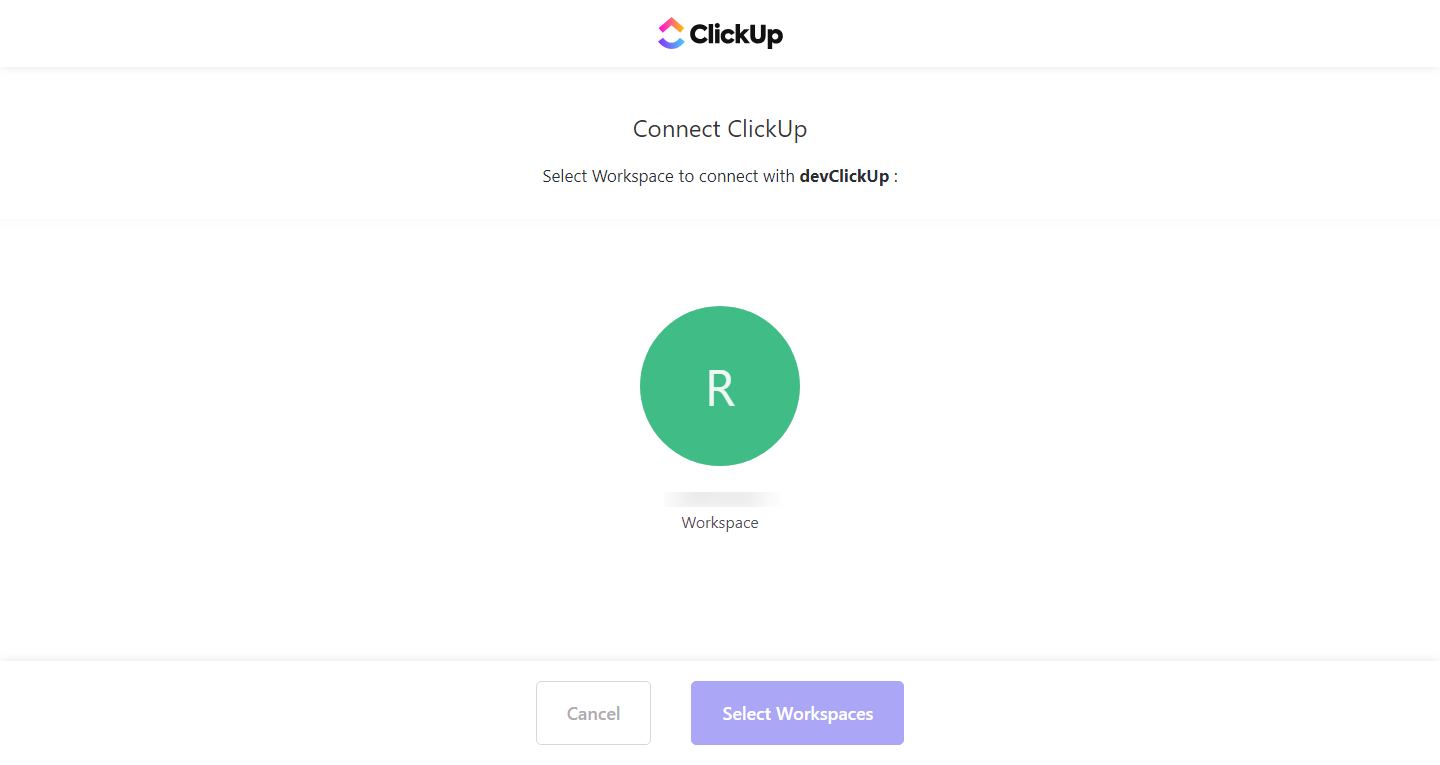
Step 13 :- After authenticating, log in with your Clickup credentials and select your workspace.

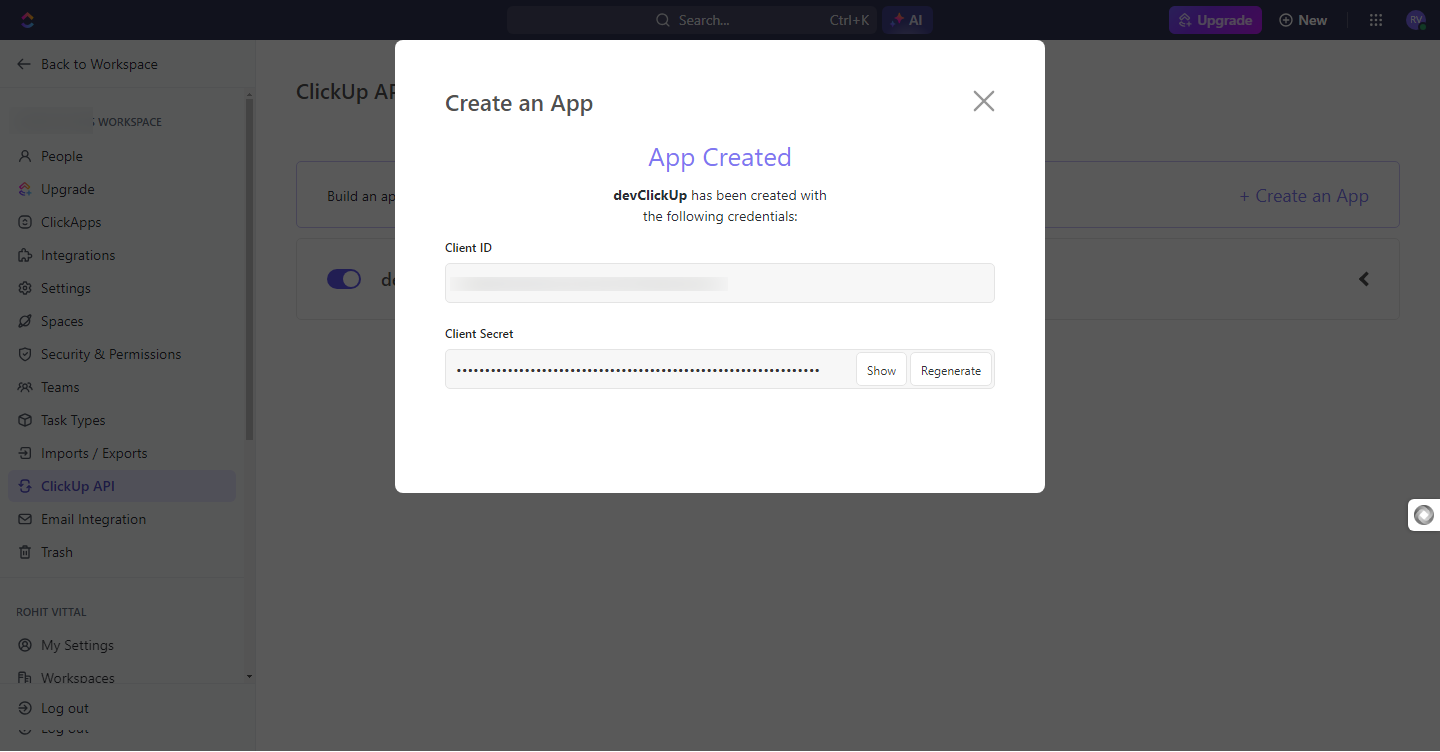
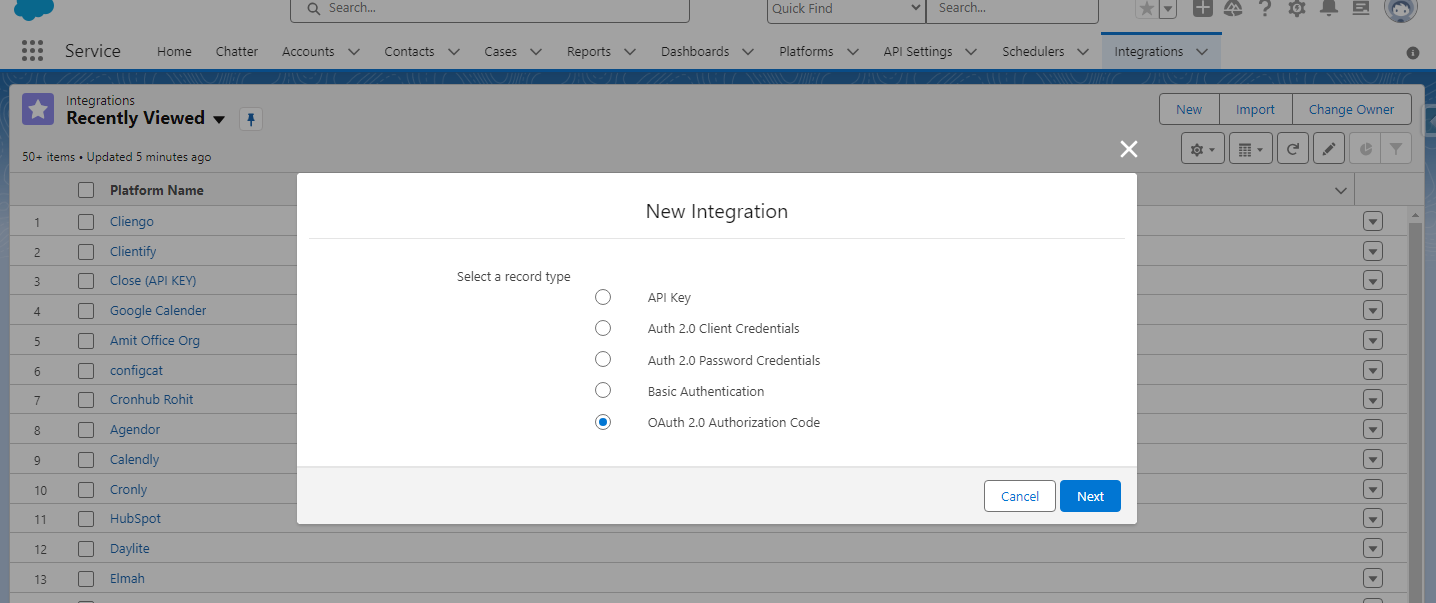
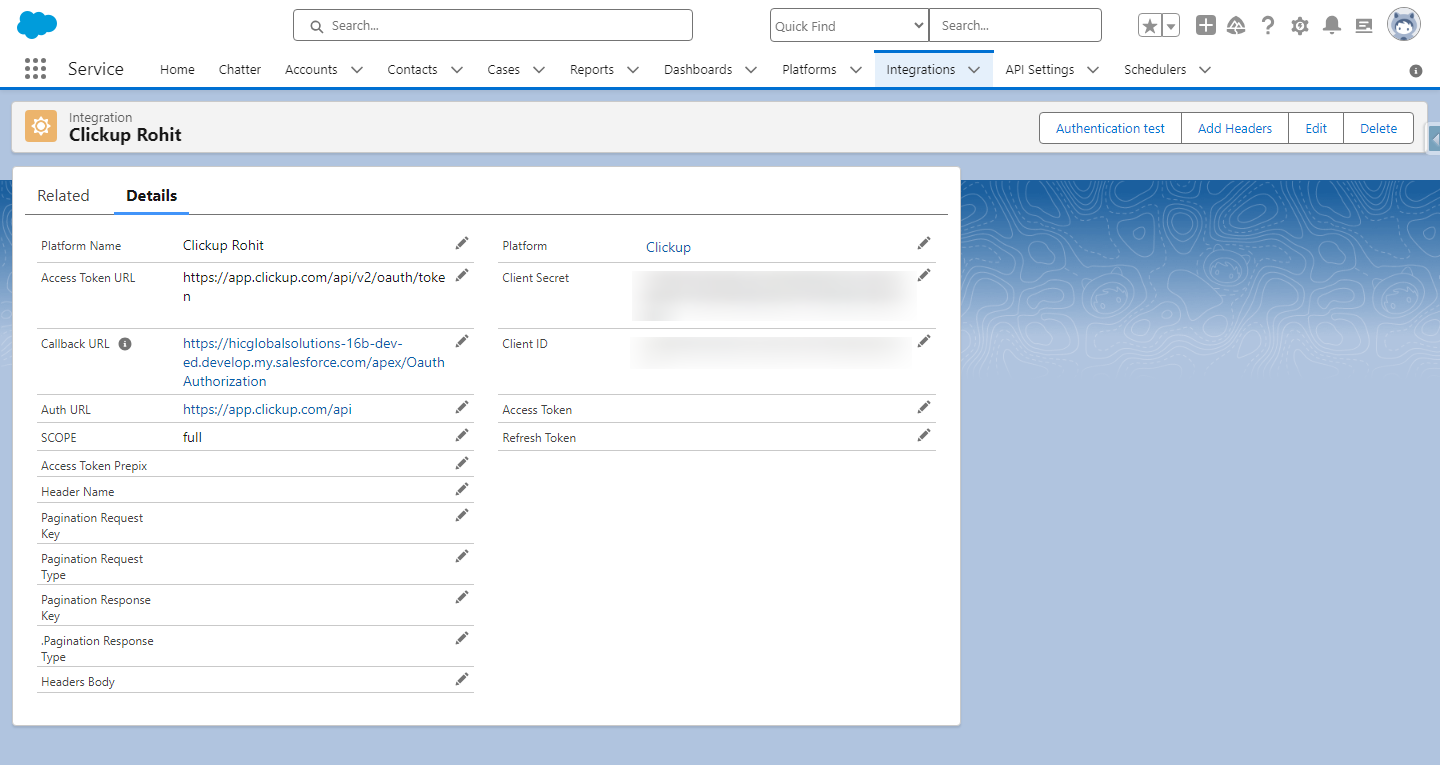
Step 14 :- Complete the Authentication

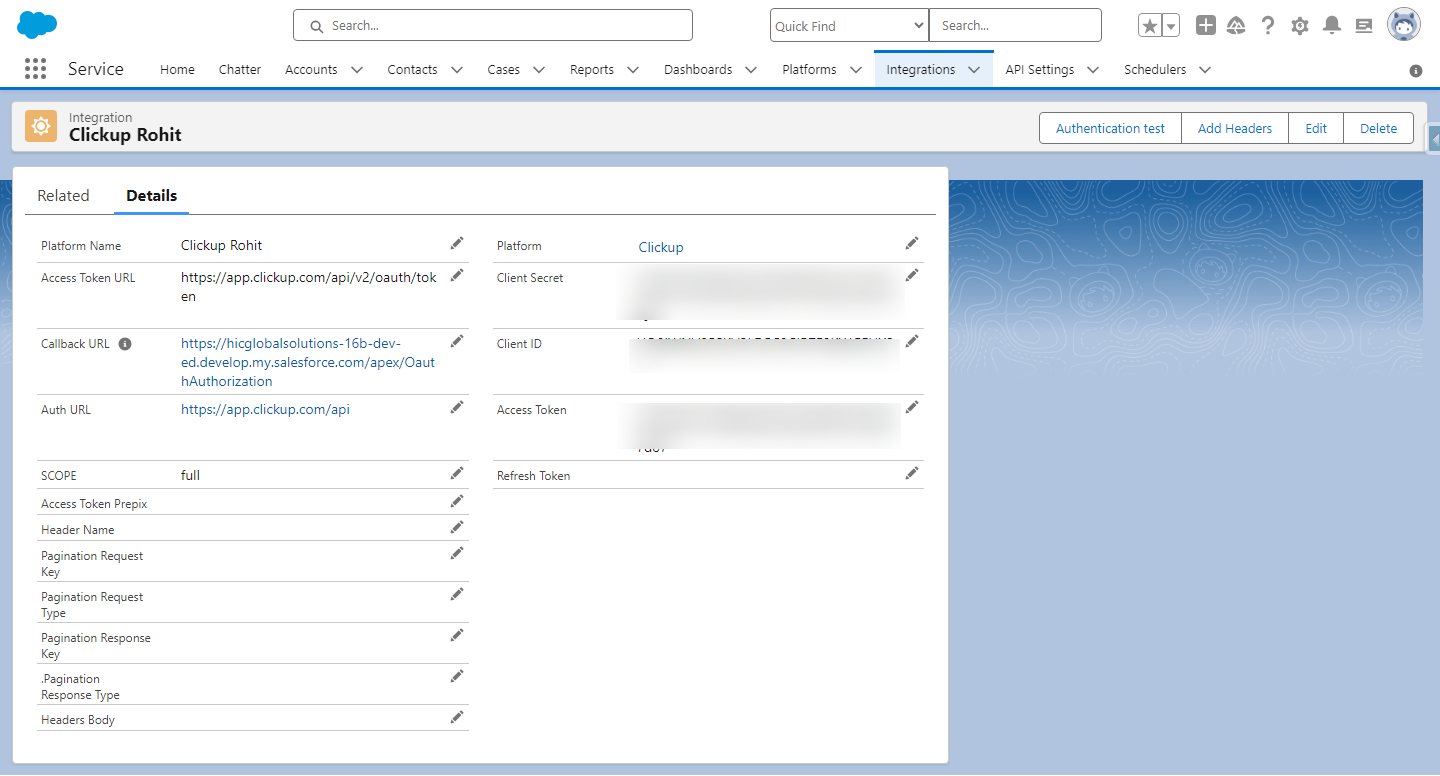
Step 15 :- As you complete the authentication the access token will be generated.

Conclusion

So, here is our strategic guide to integrating Clickup with Salesforce using MultiSync Made Easy. If you have any questions or need further assistance, feel free to contact our support team.

Don’t Get What you are looking for ?