In this guide, we have mentioned the key steps of how to integrate Bugherd into Salesforce using MultiSync Made Easy.
A Step-by-Step Process
Look at the following steps to find the Credential
Step 1:- First, if you already have an account, sign in. If not, create a new account from here.

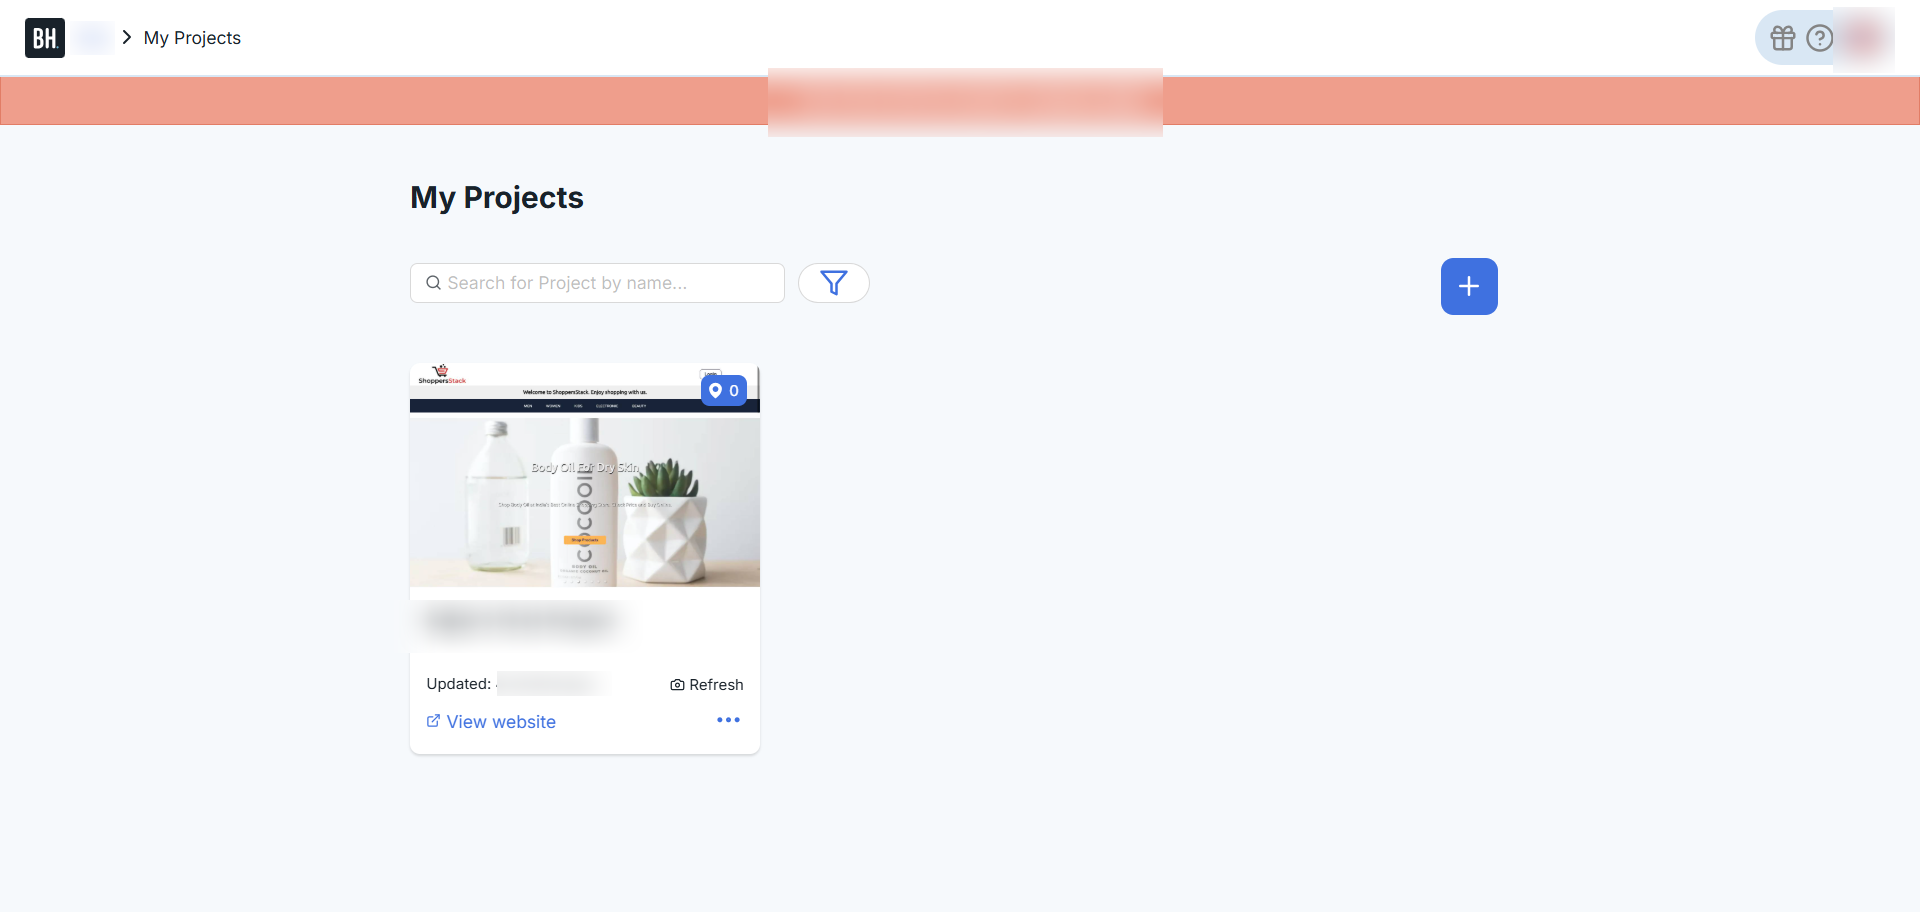
Step 2:- After logging in and creating a project, you will see the dashboard like this.
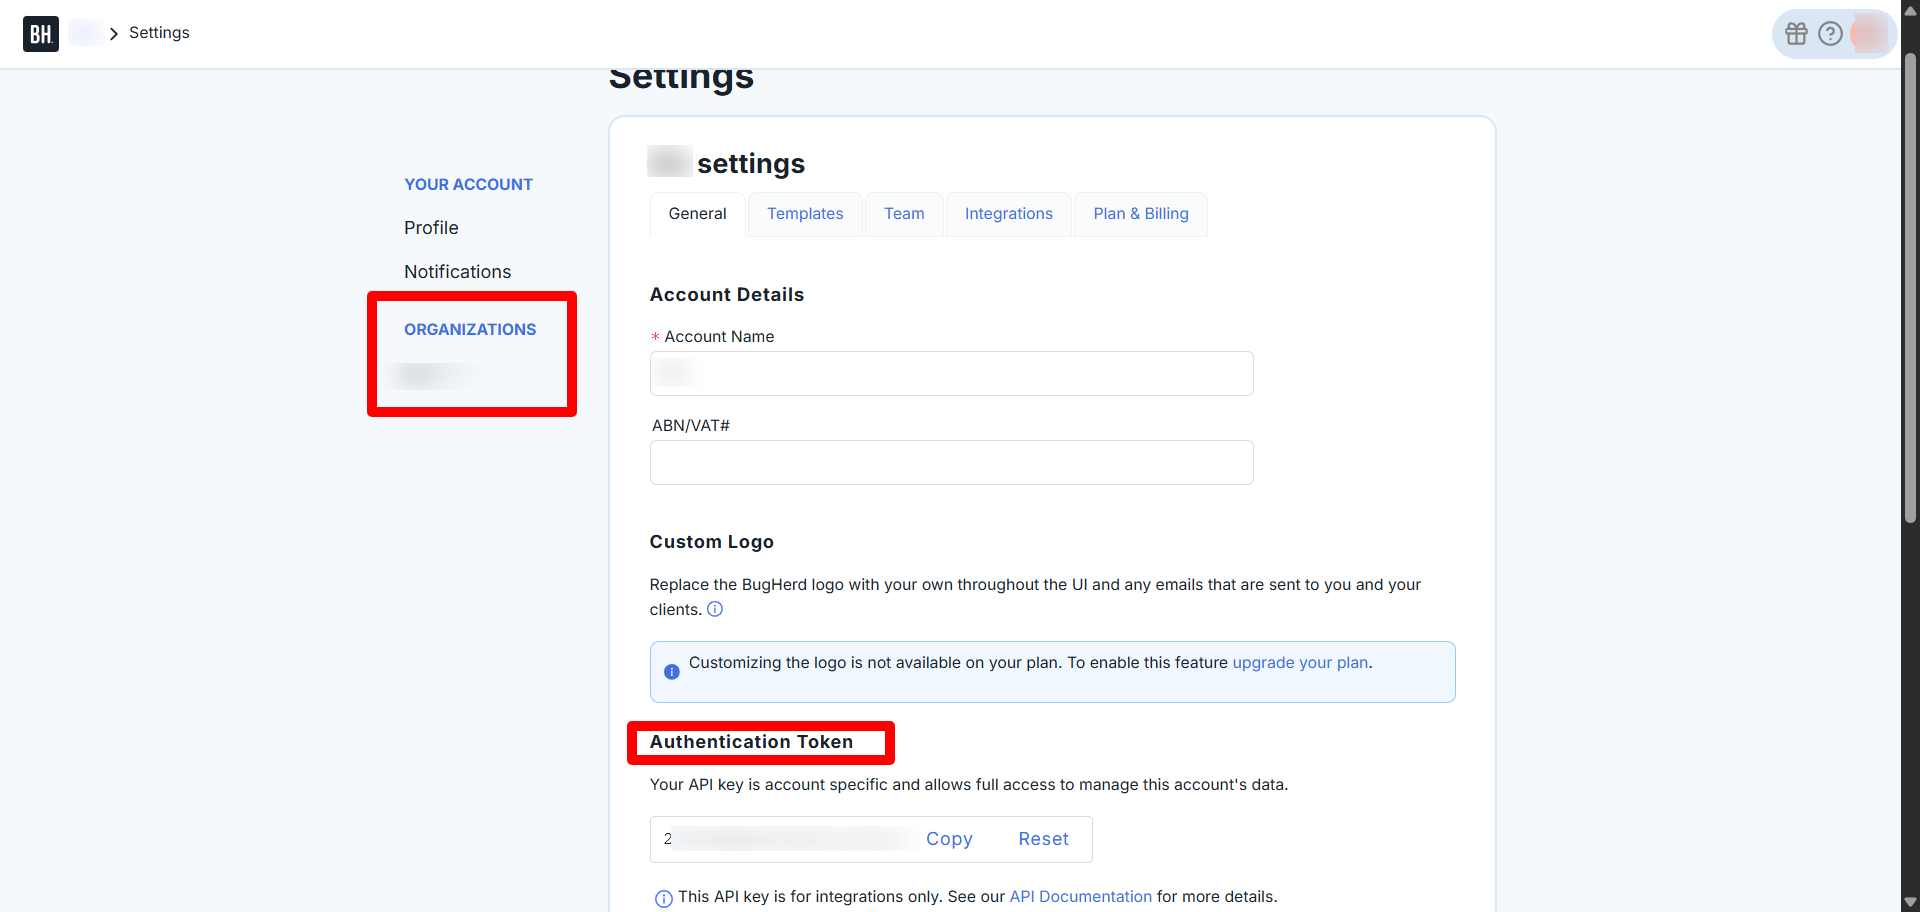
Step 3:- Next to get Api Key. Click on Profile Icon -> Edit Your Profile -> Organizations -> Authentication Token.

Step 4:- For Basic Authentication Credential use:
Username : Your Authentication Token
Password : Enter Any Random Text
Step 5:- Login the Salesforce and goto the Multisync Made Easy Page and Click on All and Search Bugherd.

Step 6:- After choosing the Bugherd , Enter Username and Password in Username Enter Api Key and in Password Enter any Random Text and Click on Save & Authentication.

Step 7:- After clicking on save and Authentication, you will see the dashboard like this. And Next Click on the Import.

Step 8:- After clicking on Import, you will see the dashboard like this & Click on Proceed.

Step 9:- After that Choose MSME External Id and Click on Preview Mapped Data and After that Click on Validate Field Mapping and After that Click on Save Field Mapping.


Step 10:- After that, you will see the dashboard like this & Click on Sync Data.

Step 11:- After clicking on Sync Data, you will see the dashboard like this & The data from Multi-Sync Made Easy has been synced with BugHerd successfully. The record was created successfully and the data has been generated.

Reference Link for your API Request: https://www.bugherd.com/api_v2
Conclusion
This is our strategic guide to integrating with Bugherd. You can explore the app at your convenience, and if you need any further assistance, please contact our Support team.
Was this article helpful?
That’s Great!
Thank you for your feedback
Sorry! We couldn't be helpful
Thank you for your feedback
Feedback sent
We appreciate your effort and will try to fix the article